
This is the first Android phone that I think I'm going to keep, so for those of you switching from iPhone over to Android, here is a post around how to get away from that whole Apple ecosystem thing, but still keep things familiar.
GETTING STARTED
First up we have the actual switch itself, of getting your data from the iPhone and over to Android. The best way to do that is to grab the quick switch adapter.
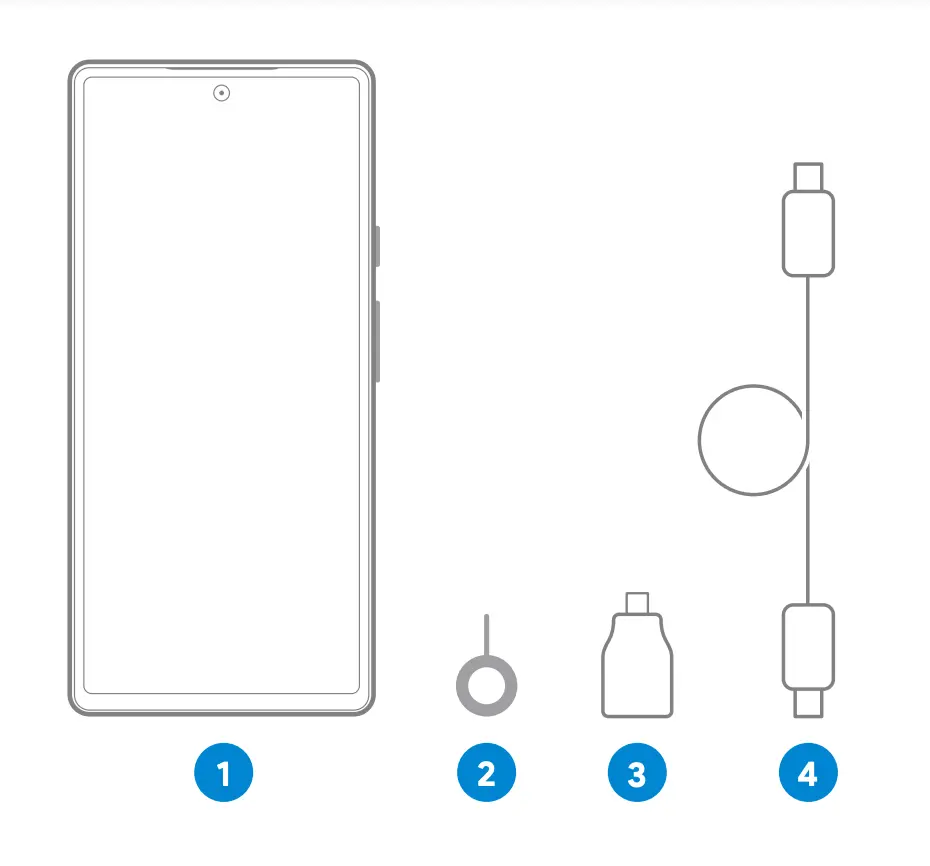
It comes in the box of the latest Pixel 6, and you just plug your Pixel into one end, and your iPhone into the other. Then it will talk you through transferring all of your Messages, Contacts, Calendars, Photos, Videos, Apps, Music, and a few other things.
But, after reviewing a few Android phones now, there are a few things that I still have only learned just recently, which fix some of the weird ways Android works with the default settings.
So firstly, if you want to go back to the gesture navigation like I've been using on iPhone for the last 2 or 3 years now, you go to:
Now your phone works in pretty much the same way as iPhone for navigating around.
One thing you need to know is that swiping in from the left goes back, which means in some Apps on iPhone where swiping in from the left opens up a menu, it doesn't do that on Android.
Next up is Notifications. And to me, notifications are actually really great with Android BUT, you have to know where to look. Because even after reviewing 6 other phones, I've only just realised my mistake.
So head into Settings, Notifications, Notification History and switch this On. Now if something makes a beep or vibrates, and you don't know what it was, you can go here to find out what's happening.
Also, this is the main one, go into Notifications, then App Settings, find the App you want to customise. Go Down to Default Notifications, and then 'Pop on screen'. This is disabled by default on a lot of apps - I guess to try and reduce the number of notifications.
But what that caused me, as an iPhone user, was that my phone would go off, even whilst I was holding it and using it - but I'd have no clue what app had just had a notification.
So if you go into your main apps and enable this, then that problem will mostly be solved.
If you're new to Android in general, I tend to find that it's best to either switch everything ON or switch everything Off by default, and then as notifications come through you can permanently disable the ones you don't want to receive.
The risk with having everything switched off by default though, is that you miss something and never remember to go look for it. So perhaps start with everything on - prepare yourself for a LOT of notifications for the first few hours, but as time goes on, they'll get more and more organised.
Notifications are one of the Androids' really powerful features, it's taken me a long time to get used to them coming over from iPhone, but if you take the time then you really can cut down the number of junk notifications you get.
Next up for those iPhone users reading, Load up Google Photos and just make sure you are backing all of your photos up, as it basically works like iCloud photos. I would also go into Settings, Battery, Battery Usage, find Google Photos, and set this to Unrestricted. I've found photos sometimes just don't upload as reliably with that set to Optimized. Also whilst we're here, if you drive a Tesla, then do the same for the Tesla App otherwise you'll sometimes be unable to get into your car when the phone decides to put the Tesla app to sleep in the background.
Just touching on photos again - I actually made a video around the best cloud service to use to back up your photos and videos, it is due for an update soon - so I'll likely post that in the next month or two - so stick around if you want to see that.
For iMessages, well - you are basically looking at other apps like WhatsApp, Facebook Messenger, Signal, Telegram - OR, if you watched my previous video, you can try an app called Beeper, which I LOVE right now.
Beeper lets me send and receive iMessages from my Android phone. So even on Android, I can stay part of those friends and family who are still in that ecosystem and be part of group chats without being that annoying friend with the green bubbles.
It also completely centralises all of my messages from other platforms too so definitely check out that video if it interests you too.
Next on the list, and speaking of installing Apps - one thing that you'll probably run into is remembering usernames and passwords for everything. If you are using Apple Keychain which is where it stores your passwords within Apple's systems, then moving to Android you aren't going to be able to use those passwords.
So what I would do, is to NOT use Google Chrome as the password manager, and use a proper password manager. I actually did a big password manager comparison to find out which one I liked best and 1Password came out on top, and I've been using it ever since. They also have a fantastic link to get 50% Off, so I'd highly recommend grabbing that instead of using the Google password manager.
Once you've got 1Password installed, make sure you head into the Settings, Autofill, and enable all of the autofill settings. And be sure to switch off any built-in Google password managers or they'll clash and constantly be prompting you to save each other's passwords.
Apple Pay
Let's talk about Apple Pay. It's basically the same, but it's called Google Pay. So fire it up, and add all of your cards. Then when you want to pay for something, just hold your phone over the card machine. It does need to be unlocked, I found the easiest way was just to rest your finger on the fingerprint reader so that it can scan your fingerprint mid-payment, or just unlock it before holding it up.
Now one thing that did catch me out was not being able to swap the card I was paying with. So to do this you just tap the Google Pay icon in the bottom right corner, then you can change cards.
Google Assistant
Voice is next up - and this is one I'm really excited about for this Pixel 6, as it had some really cool features. Live transcription of auto-attendant menus with the whole press 1 for sales, 2 for accounts thing.
Call Screening also is fantastic, in some cases. Though most instances where I used Call Screening just assumed it was voicemail and hung up.
With that said - you CAN, however, use your voice SO much easier than Siri to send messages. Something I cover off in a video around Siri vs Google Assistant, which is well worth a watch.
