

Me and my nearly 8yr old son are about to build the most expensive computer I’ve ever owned in my life.
He has zero experience. I’m a mac user - and the last PC I built was back when keyboards and mice used PS2 connectors, so it’s been a VERY long time!
But my kid is starting to get into gaming in a big way, I play Fortnite on my Xbox every night with my friends, and I have this huge 240hz, 57” Ultrawide Gaming monitor that is just begging to be connected to a proper gaming PC, instead of the current Mac Studio.
If you’re building yours for the first time, I hope you’ll be able to use this as a guide when putting yours together - because as I’ve discovered, it’s taken me quite a while to get my head around all of the available options.
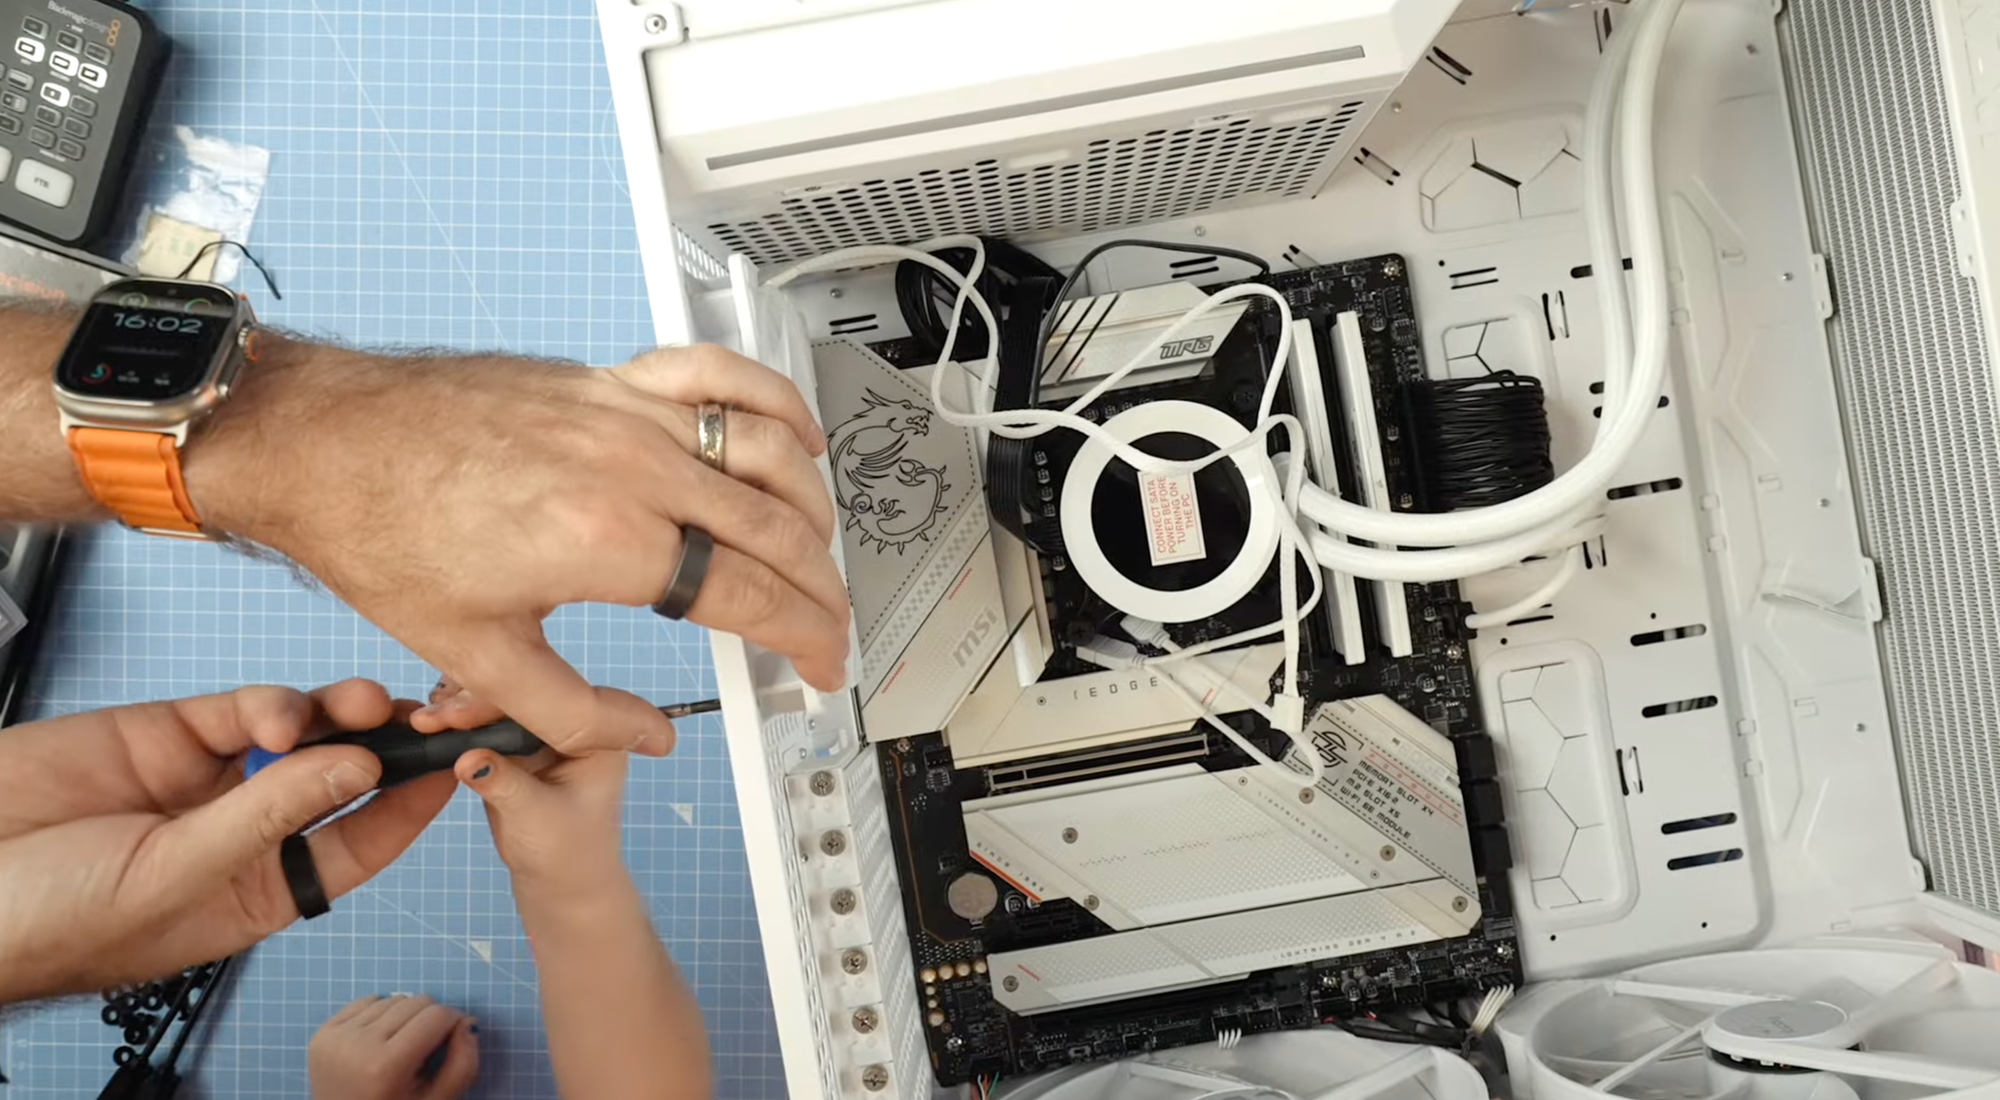
So the first part that you’ll want to start with is the Motherboard, and I went with the MSI Z790 Edge board here. This is very white - it’s the look I’m going for with this build. Super clean and as much of the components are white where possible.
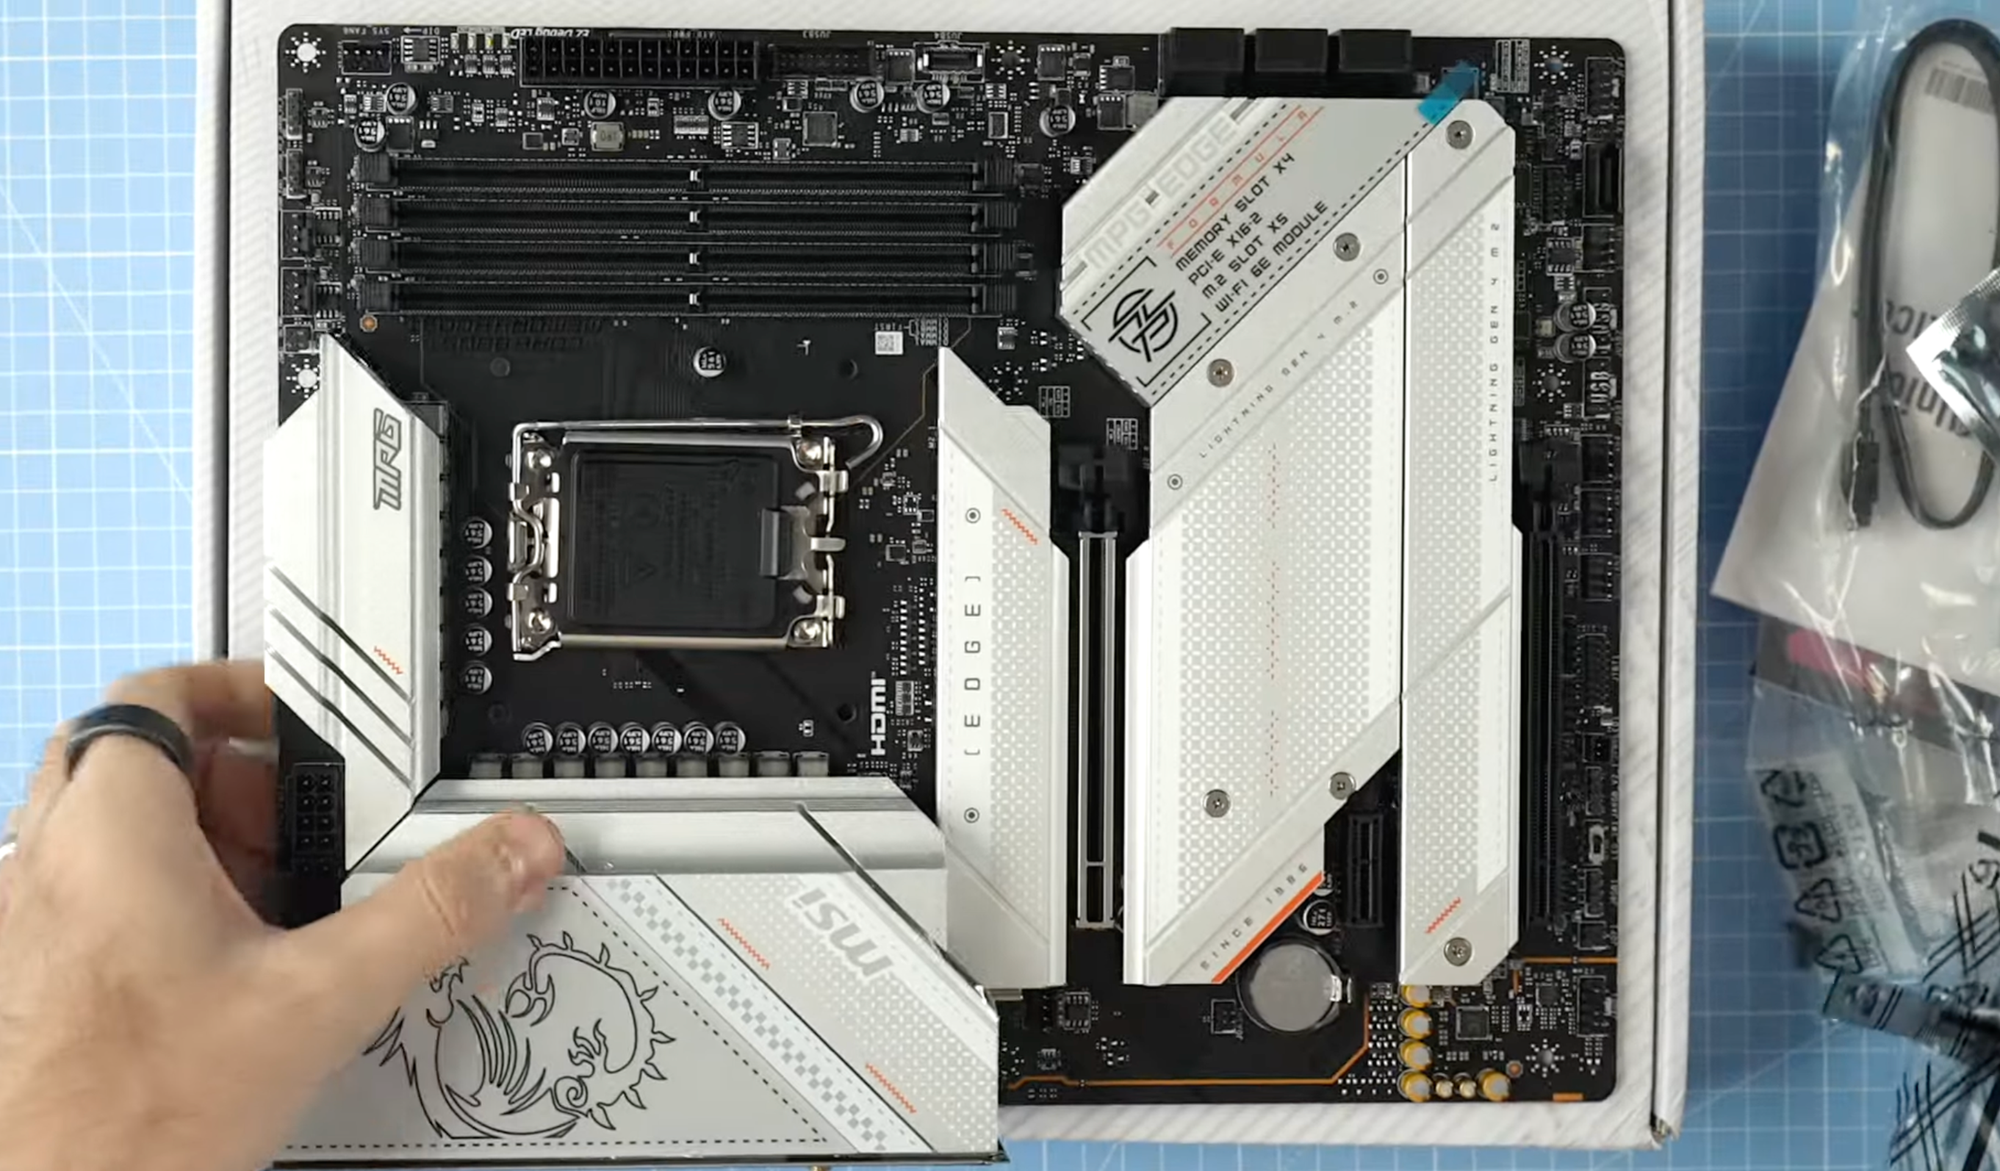
And you’d think you’d be better off starting by putting the motherboard into the case - but before you do that, it’s better and easier to do a couple of things first.
First, install the Processor. And for the processor, we use the newly released, Intel 14th Generation chip processor.
The Intel i9 14900K CPU. It’s one of the fastest CPUs available and it’s one of the most important parts to a build, because it drives the whole machine.
But before I installed this into the motherboard, you need to insert a bracket.
What you do is unscrew the standard metal bracket on the motherboard, drop the CPU in, and then screw down this replacement bracket on top.
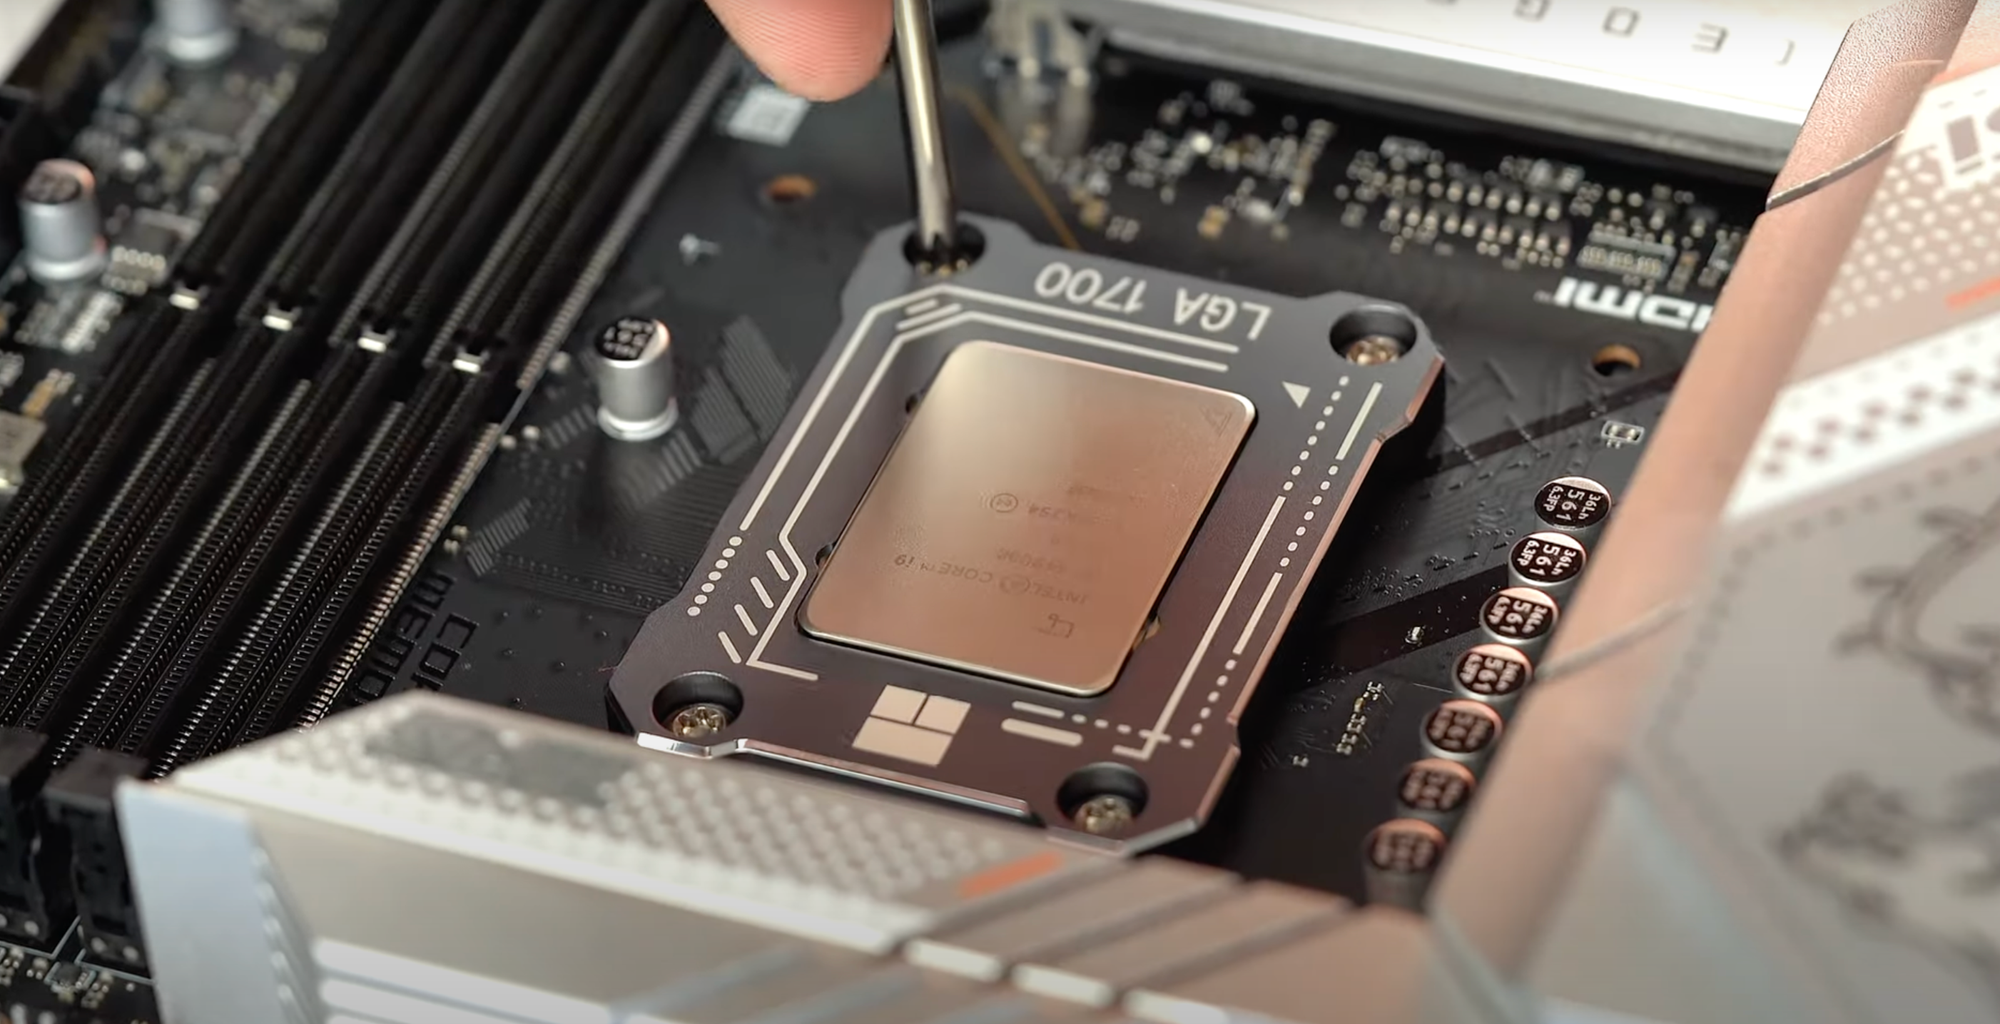
And by doing this, tests show that it drops the temperature of your CPU by a few degrees. Which when building a powerful PC like this, and also with the i9 14900K which runs at a fairly high temperature as it is, it’s well worth it for the low cost of one of these brackets.
So now we have the CPU installed. Next up is installing the memory dimms. I went for 64GB of Corsair Vengeance DDR5 at 5200MHz. And I went to the regular white sticks of memory without going too overboard on the RGB with this build.
Since there’s only 2 dimms and after some RTFM, these need to be installed in dimm slots A2 and B2.

And finally, before we install the motherboard into the case, now is also the time where you can fit any M2 Storage. And we actually used 3!
First we have the 1TB Samsung 990 Pro drive which is going to run Windows. This one is going into slot 1 on the motherboard so it’s just a case of unscrewing the thermal shield, removing the plastic cover on the thermal stuff, slotting the chip in, rotating the screw to secure the chip, removing the plastic cover on the top part and then screw the plate back down.
Next, We have 1TB from Nextorage. These are both superfast SSD drives which can read and write over 6000MB/s, which is crazy fast. I’m going to use this one for all of my Data.
This one I didn’t realise actually comes with a heatsink attached, so we had to unscrew the heatsink and remove the thermal coatings, since our motherboard already has some of this built into the plates that are screwed down over the top of the M.2 Storage.
And then we have a 4TB Western Digital M.2 drive, which is going to hopefully hold all of my game installs.
So now all of those parts have been fitted - we can install the board and everything we’ve installed into the case. And for the case - I chose the Fractal Torrent case. It is a relatively old case, but from all of the research I did around the case - this one consistently scored highly in terms of cooling. It had great reviews, and it fits our aesthetic.
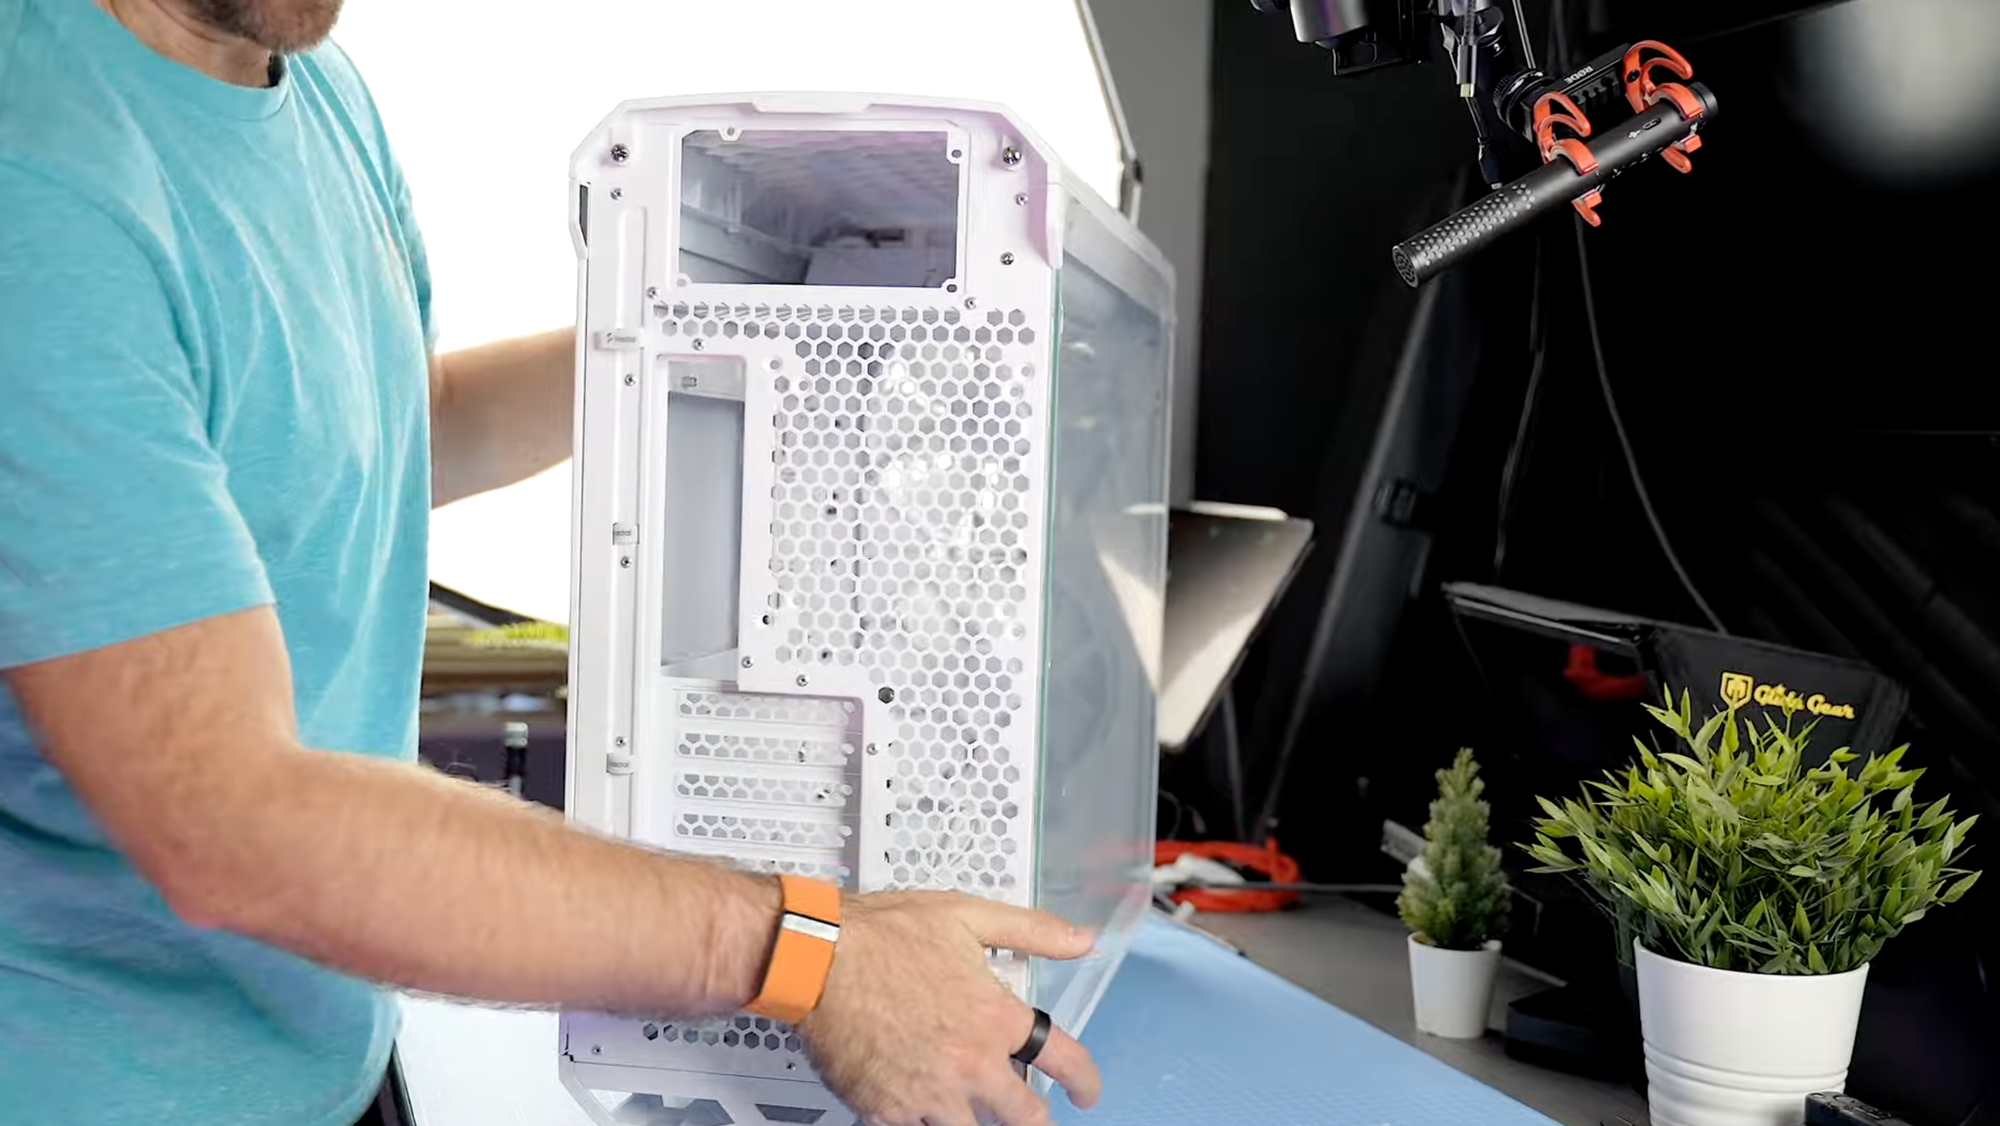
There are some built in fans already, and it has tonnes of space in there for cable management, and space for if I ever want to swap parts out from this PC such as swapping the graphics card, or adding even more storage.
But before I did anything I removed all of the panels from the top, front and the 2 side panels so I had access to everything.
With the case you’ll get all of the fittings needed to attach the board to the case, but it’s just a case of lining up the board with the fixings on the back, and then screwing in each part of the board to the case.
Once I did that. it started to look like a real PC!
Next it was time to connect all of the wires from the case to the motherboard. These are things like the top audio, USB, power and reset switches, along with some of the fans.
Now there are a few tweaks we needed to make to the case.
I was using a CPU cooler, and with this case it will only fit in the front, so removed the fans from the front and replaced them with the CPU cooler.
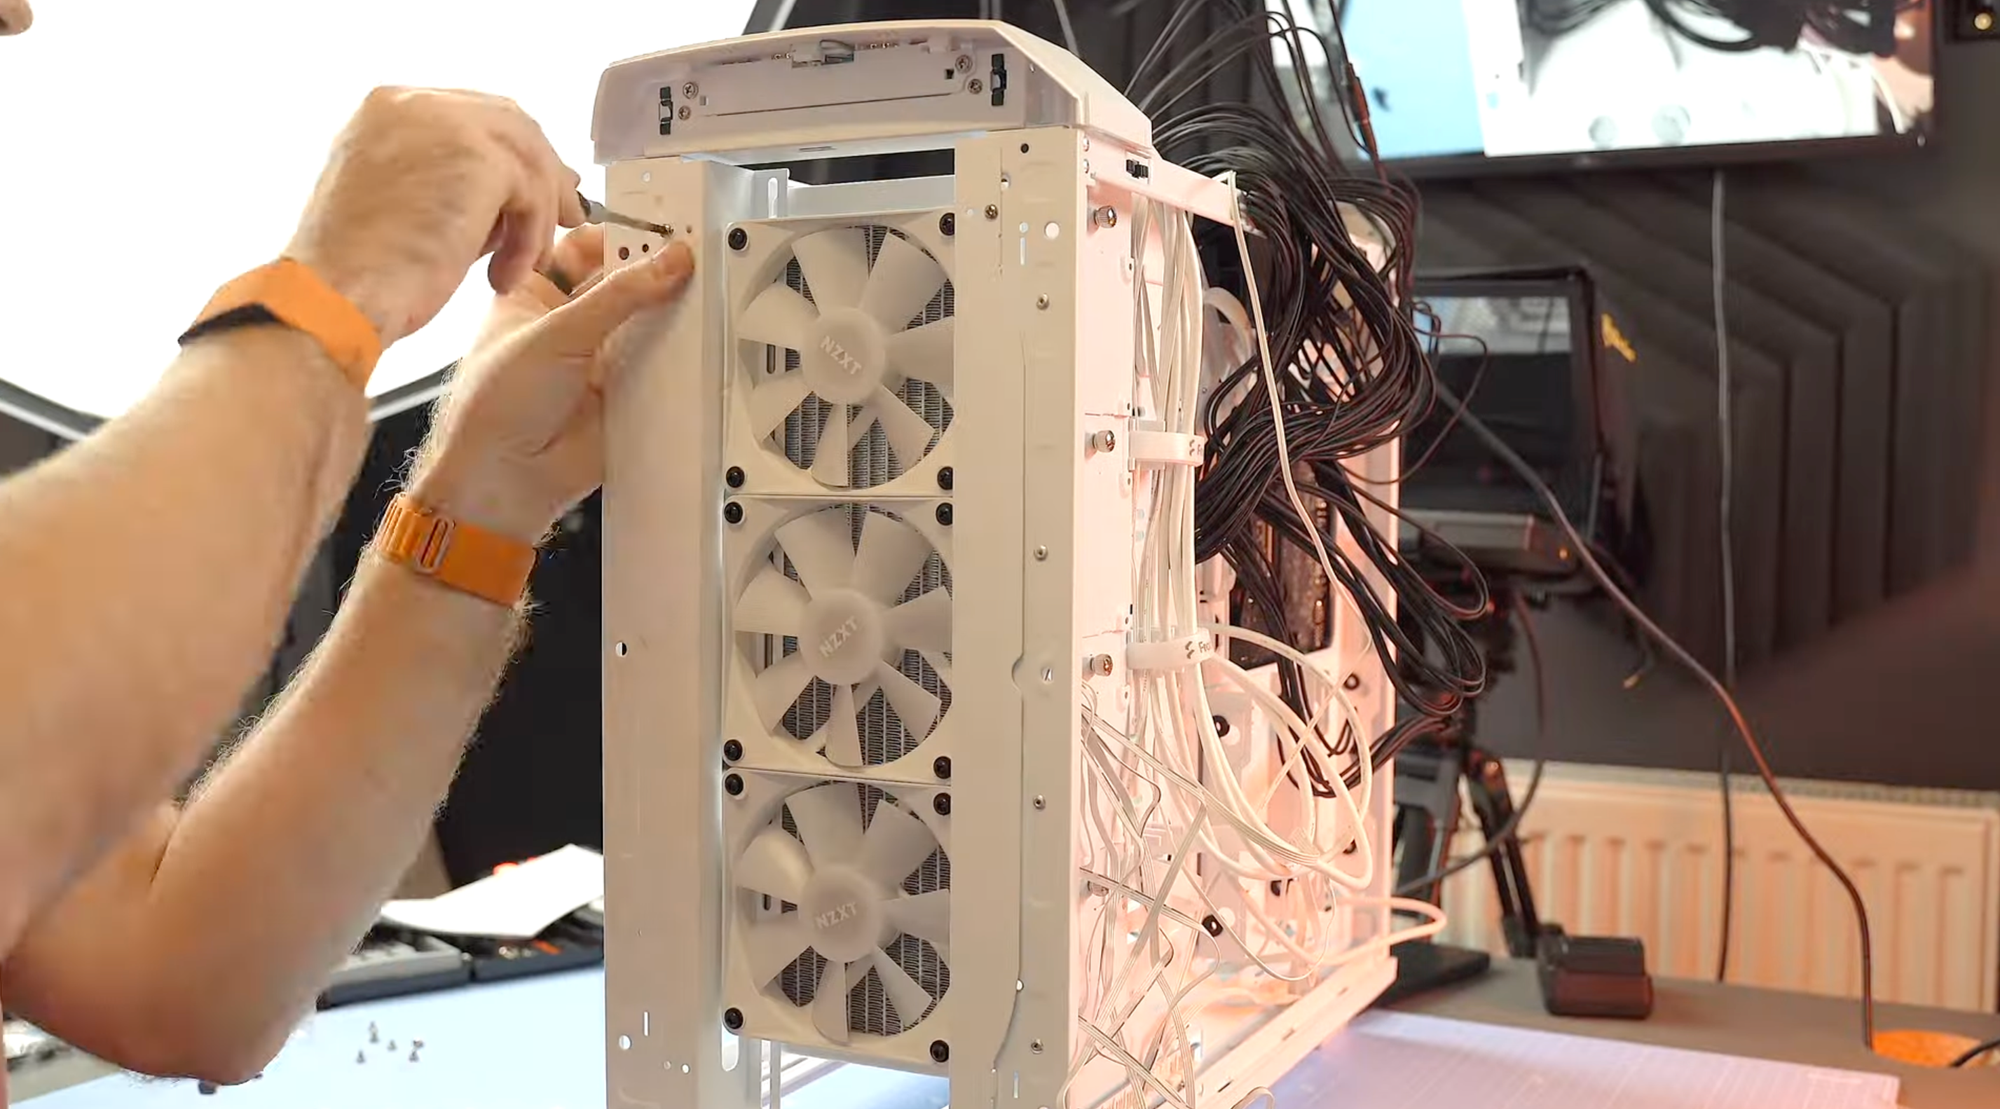
I’m also removed one of the fans from the bottom so there was enough space though I later realised that actually I could fit the 2 larger fans at the bottom instead, so I did end up swapping those out again.
Next up, I installed the Power Supply into the case. This is the MSI Ai1300P, which is slightly overkill for this build BUT I wanted to make sure that if I did want to ever upgrade or swap out parts, then I wouldn’t need to worry about changing the power supply too.
And the nice thing about this is that it’s modular, so you can just connect up the parts you need, without having a tonne of wires trailing around and hanging in the case, making it all messy looking.
With that fitted, we then got to fit the cooler onto the CPU. I went with the Kraken Elite from NZXT. And this is where I thought I messed up. Because in the box you get a bracket which goes on the back of the motherboard, which the cooler then mounts onto. But thankfully this case has a cutout for behind the CPU which means I could just slot the bracket right on, attach some screws and attach the cooler.
Another good thing here is that there’s already thermal paste on the cooler, so you don’t need to worry about applying thermal paste and getting it all perfect, you can just attach this cooler and be done with it.
The fans also then needed screwing into the case. And this, combined with the bracket we fitted will do the absolute best job at keeping our CPU as cool as possible.
And finally, the most expensive component to fit into this whole PC - and that’s the GPU, the graphics card.
We used the ASRock 7900XTX, and I specifically ordered this card because, well, it’s white - so it fits our build. But it’s also, at time of building our PC, the only card on the market that can actually run my Samsung 57” G9 Neo screen, at full native resolution, and at the full 240Hz, because it has HDMI and DisplayPort 2.1 ports on the back - I really hope that’s true - We’ll find out if that’s true when I boot this thing up.
Tidying up
There is a support bracket that came with the case to install which holds up the graphics card and supports the weight so it doesn’t sag over time.
Next, we hooked up the power.
And the only thing to do next was to tidy up all of the messy cabling and put the panels back on the case.
And here it is! My completed build, which I’m pretty pleased with!
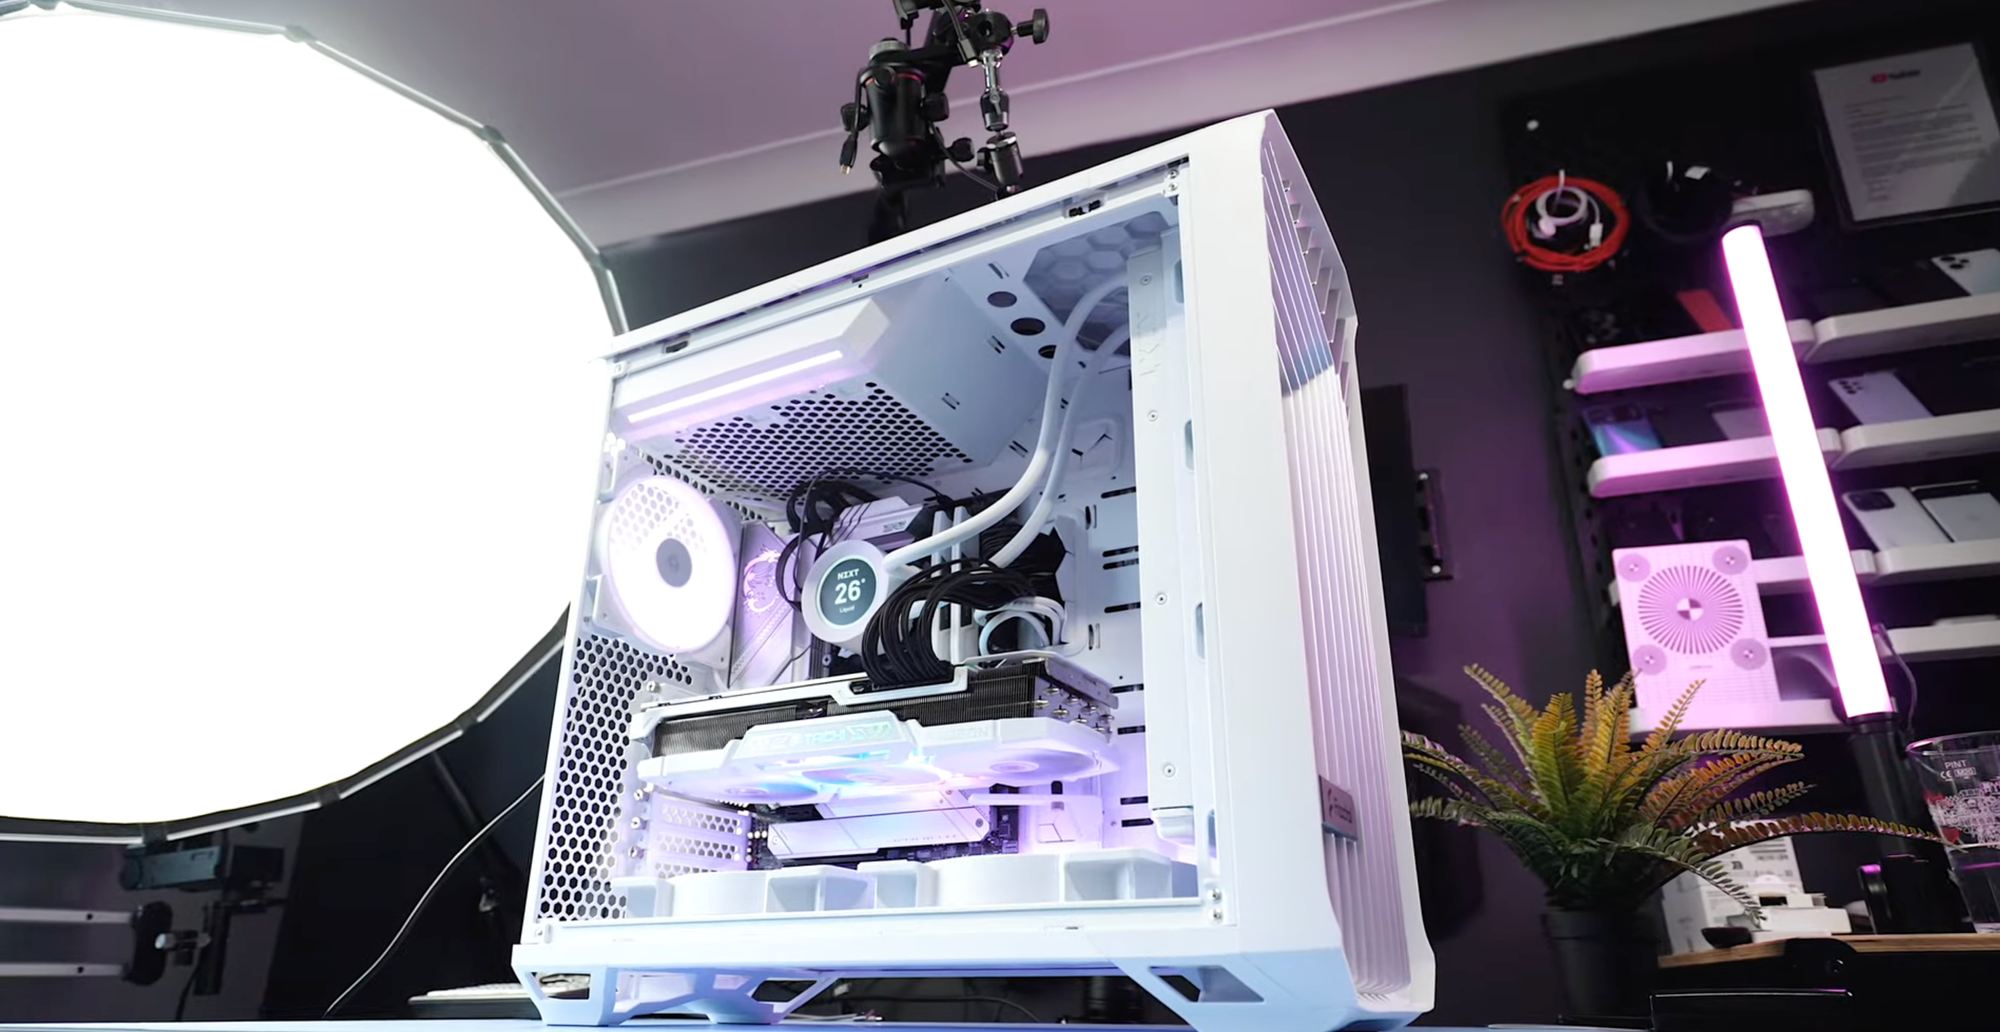
The only minor things I want to improve are to swap out the stock power cables for some white ones from CableMod, which I’ve ordered but they’re going to take between 2-4 weeks to get here.
Missing Items
The only thing I’m missing from this Gaming PC setup is a Keyboard, Mouse, and a Gamepad. So if you have any recommendations on the best ones to buy - let me know.
But I’m going to go away now and start testing this build on my 57” G9 Ultrawide screen, and I’ll post soon on how it performs in various games. So make sure you subscribe to catch that.
