


Every time I set up a new iPhone, I see the same thing happen. Some people have everything transferred and ready to go in under an hour, while others end up spending half the day troubleshooting problems that could have been avoided from the start.
The good news is that Apple's Quick Start tool has made moving from one iPhone to another much easier than it used to be. When everything is set up properly, it can transfer your apps, photos, messages, settings, and account information with very little effort on your part.
The Quick Start iPhone setup process itself only takes a few minutes to begin, but there are a handful of things worth checking before you start.
In this guide, I'll walk you through the process step by step, show you the settings that matter, and cover the most common problems so you can avoid them before they slow you down.
Before You Start
Apple Quick Start is the simplest way to set up a new iPhone when the old iPhone is available, connected to Wi-Fi, and has Bluetooth turned on. Before you turn on the new phone, run through this list.
The most important one on that list is Wi-Fi. If you're on a slow connection or you're far from your router, move closer before you start. A large photo library over a weak signal is the number one reason people end up waiting hours.
Step 1: Place Your iPhones Next to Each Other
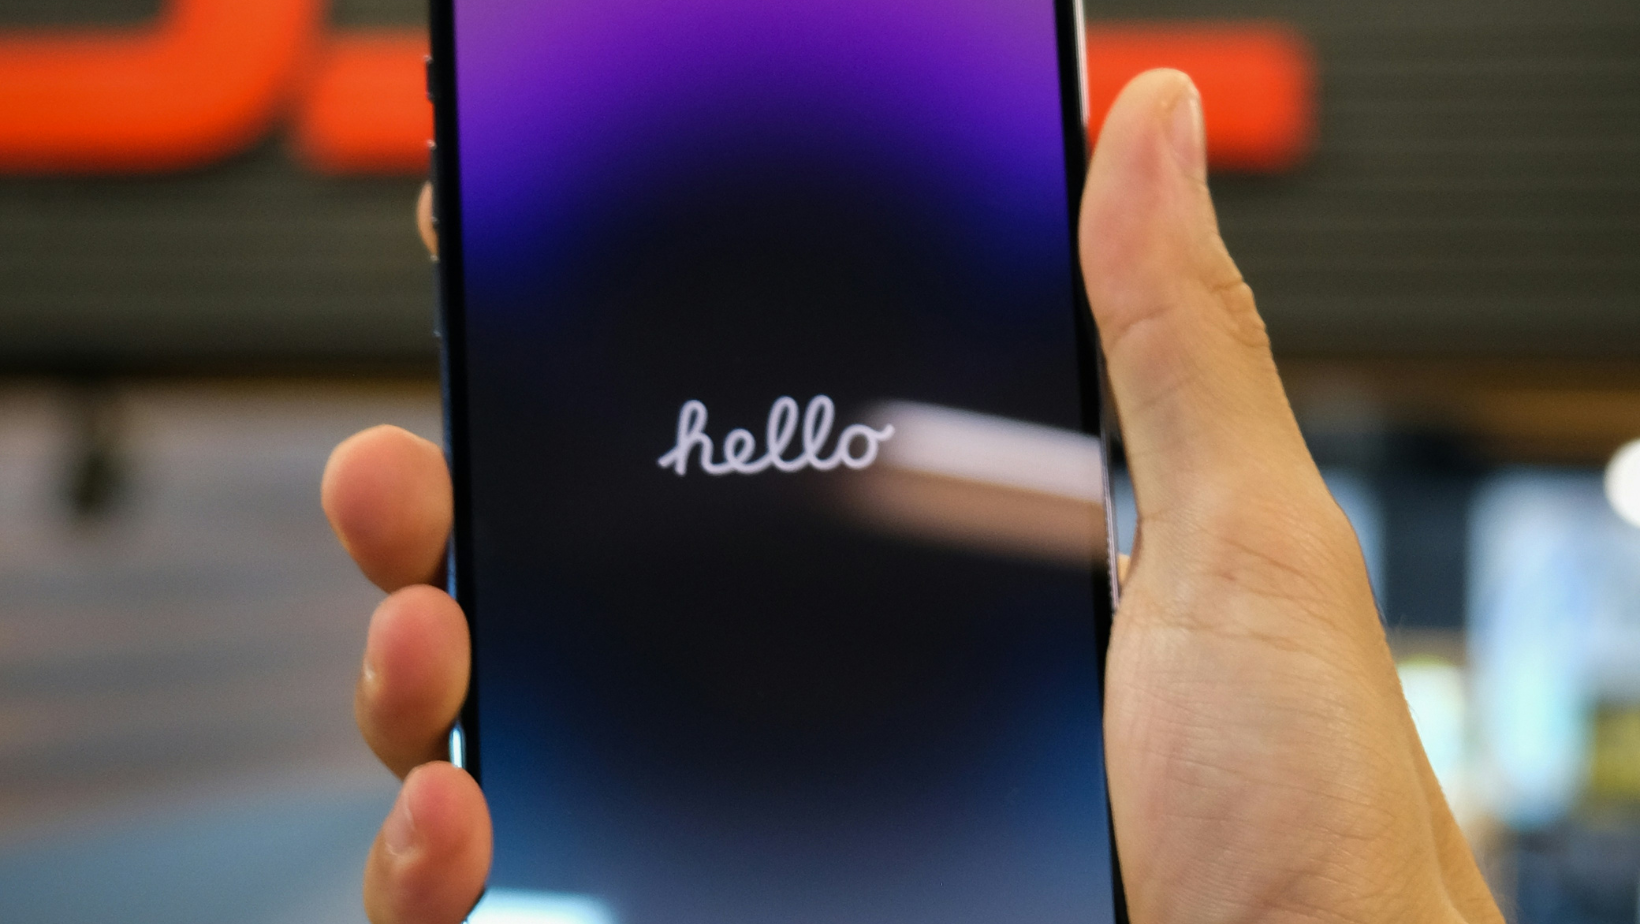
Turn on the new iPhone. It'll show a "Hello" screen. Unlock your old iPhone and hold the two phones close together. Within a few seconds, a Quick Start prompt should appear on your old iPhone asking if you want to use your Apple ID to set up the new device.
Tap "Continue." If the prompt doesn't appear, check that Bluetooth is on and that your old iPhone is unlocked. Sometimes restarting both phones and trying again is all it takes.
Step 2: Scan the Animation
Your new iPhone will display an animated pattern on screen. Your old iPhone will ask you to point its camera at it. Hold the old phone's camera over the new phone's screen and center the animation in the viewfinder. It scans in a few seconds and confirms the pairing.
If the camera scan isn't working, there's a manual option. Tap "Authenticate Manually" and enter your Apple ID password instead.
Step 3: Authenticate and Begin Setup
Once the devices are paired, you'll be asked to enter your current iPhone's passcode on the new device. This is how Apple verifies the transfer. After that, you'll set up Face ID or Touch ID on the new phone and confirm your Apple ID.
This is also where eSIM transfer happens if you're on an iPhone 17 or 18. You'll see a prompt to transfer your phone number. Tap through it, and your carrier plan moves over automatically in most cases. No carrier call required.
Step 4: Choose Your Transfer Method
This is the only part of the process where you really have a decision to make. If you still have your old iPhone sitting next to you, I'd almost always choose a direct transfer. It's usually the simplest option and, in my experience, the fastest.
Direct iPhone-to-iPhone Transfer
With this method, your new iPhone pulls everything directly from the old one. Your apps, photos, messages, settings, and account information move across without needing to restore from a backup first.
The biggest thing here is patience. Keep both phones plugged in, leave them close together, and resist the temptation to start using them while the transfer is running. Most of the problems I've seen happen because one device gets disconnected or moved too far away.
iCloud Transfer

If you no longer have your old iPhone or you're setting up the new device somewhere else, iCloud is the better option. Instead of transferring directly between phones, your new iPhone restores everything from your latest backup.
The trade-off is that it can take longer, especially if you have a large photo library or a lot of apps. The upside is that you don't need both devices in the same place.
For most people, direct transfer is the route I'd recommend. If both phones are available, it's usually the quickest way to get everything moved across and start using your new iPhone.
Step 5: Let the Transfer Finish
Once you've selected your transfer method, a progress screen will appear. Leave both phones plugged in, keep them close together, and don't use either one for anything intensive while the transfer is running.
The progress estimate on screen is often wildly inaccurate in the early stages. Don't panic if it says "3 hours remaining" at the start. It usually speeds up significantly once it gets going.
When the transfer is complete, your new iPhone will restart, and you'll be taken through a few final setup screens. Apple Pay cards will need to be re-added. Some banking apps and two-factor authentication apps will need to be re-verified. That's normal and expected.
Common Quick Start Problems and Fixes
Quick Start Isn't Appearing
The most common cause is Bluetooth being off on the old iPhone. Go to Settings, then Bluetooth, and make sure it's enabled. Also confirm both phones are running a compatible iOS version. If you're trying to transfer from a very old iPhone running an outdated iOS, Quick Start may not be available.
I've had Quick Start refuse to appear on the first attempt before. A quick restart of both phones is often enough to get things moving again.
Transfer Is Taking Too Long
Move closer to your router. If a transfer seems stuck for hours, the first thing I'd look at is your Wi-Fi connection. You can also check if your router supports 5GHz or 6GHz and connect both phones to that band rather than the slower 2.4GHz network.
If you have a very large photo library (over 200GB), consider using the iCloud option instead. Let the new phone become usable first and allow the photos to download in the background over the next day or two.
Apps Aren't Downloading
After the transfer, apps need to re-download from the App Store. This happens automatically but can take time depending on how many apps you have. Make sure you're connected to Wi-Fi and signed in to the App Store with the correct Apple ID. If specific apps aren't appearing, open the App Store, tap your profile icon, and check the "Purchased" section.
Photos Are Missing
If your photos aren't showing up, check that iCloud Photos is enabled on the new phone. Go to Settings, tap your name, then iCloud, then Photos. If the library is large, it may take several hours to fully sync. The photos are there; they're downloading in the background.
After Quick Start Finishes
Before you put your old iPhone away, spend a few minutes checking the things you use most often.
Open your messages and make sure your conversations are there. Jump into Photos and scroll back through a few older albums. Open any banking apps, authentication apps, or other services that require extra security and confirm they're working as expected.
You'll also need to set up Apple Pay again and re-verify some accounts. That's normal and doesn't mean anything went wrong during the transfer.
If your phone number transferred during setup, make a quick call or send a text before calling it done. Most transfers work immediately, but it's worth confirming everything is working before you erase or trade in your old device.
A Little Preparation Saves a Lot of Waiting
Quick Start has become one of the easiest ways to move from one iPhone to another. Most problems happen before the transfer even starts, whether that's a weak Wi-Fi connection, an outdated device, or a missed setting.
Spend a few minutes preparing both phones, keep them connected to power, and let the transfer finish without interruption. Do that, and setting up a new iPhone is usually far less stressful than people expect.
Want more tips like this? I share practical tech advice, setup guides, and the gear I'm testing in my newsletter at experimentsinprogress.com.
Frequently Asked Questions About iPhone Quick Start
How long does iPhone Quick Start take?
Quick Start can take anywhere from several minutes to several hours, depending on the amount of data, transfer method, Wi-Fi conditions, and device connection. A phone with a large photo library and many apps will take longer. Keep both iPhones connected to power and close together until the transfer confirms that it is complete.
Do both iPhones need Wi-Fi and Bluetooth for Quick Start?
The old iPhone needs Wi-Fi access and Bluetooth turned on for the normal wireless Quick Start process. The new iPhone will connect to Wi-Fi or cellular service during setup. Bluetooth allows the devices to find and pair with each other, while Wi-Fi supports activation and the transfer or download of data.
Does Quick Start transfer everything to a new iPhone?
Quick Start transfers most apps, data, settings, messages, photos, and account information, but some items require additional steps. Apps and media may need to download again, Apple Pay cards must be reverified, and some accounts may request passwords. Health and password data may also depend on account security and backup settings.
Can you use your old iPhone during Quick Start?
You generally cannot use either iPhone normally while a direct device-to-device transfer is running. Both devices need to remain close together until it finishes. An iCloud-based setup may let the new iPhone become usable sooner, although apps, photos, and other content can continue downloading in the background afterward.
What should you do if the Quick Start prompt does not appear?
Restart both iPhones if the Quick Start prompt does not appear. Confirm that the old iPhone is unlocked, connected to Wi-Fi, signed in to the correct Apple Account, and has Bluetooth enabled. Place the phones beside each other again. Updating the old iPhone before retrying can also resolve compatibility or setup problems.
